Monday, August 13, 2012

Child Passenger Safety Technician


What is a Child Passenger Safety Technician?

A child passenger safety technician (CPST) is an individual who has been trained to help educate parents, grandparents, or any care giver on how to correctly install and use their child's car seat/booster. CPSTs go through a 40hr course that includes both classroom time and hands on practice. Technicians must pass three written test and three hands on test to become nationally certified. After they pass the course they must re-certify every 2 years. This requires them to stay up to date by having 6hrs of continuing education hours to re-certify. Technicians are highly educated on the topic of transporting children in vehicles and a great resource for parents. Even if you feel you have your child's seat in right and you're using it correctly it never hurts to have someone give it a good look over for you.

Finding a Child Passenger Safety Technician?

There are several technicians throughout the nation. Most CPST are volunteers and there is no cost to you as a parent to meet with one. Many technicians have day jobs as policemen, firemen, or health care works. Not all policemen and firemen are CPSTs. Make sure to ask specifically for a CPST when calling the police station, health unit, or fire station. When you meet with a CPST ask to see their certification card. They should have an up to date, no older than 2yrs old, certification card with a technician number on it with them when preforming checks. Sometimes good hearted police or firemen will help you and might not give you the best information. So make sure you are meeting with someone who is currently certified.
Some technicians are just individuals who have a passion about child passenger safety. They choose to take the course and to meet with parents in their free time. These technicians are some of the best technicians. Their passion is what drives them to stay up to date on new regulations and what seats are new to the market. But make sure to also ask them for proof of certification too. And be careful on where you  meet with these individuals. If they are not associated with a non profit organization that specializes in child passenger safety and meeting with you at this organization, please make sure you are meeting with them in a public place. You and your families safety is the most important thing. You can find a CPST in your area by searching here.


What to expect when meeting with a CPST
A good technician is one that will not only install your child's seat but will also teach you how to do it. The goal of the Child Passenger Safety program is to be an educational service to parents, not an installation service. To learn more about what to expect from a CPST click here.
The goal of a technician is to have your child leave safer than when they came and that you feel confident in using and installing your child's seat. I want you to be educated on why I recommend what I do and I want you to feel confident in the choices you make as the parent. A technician should always be respectful of parental choice. No one should ever make you feel bad for the choices you make for your child. Meeting with a CPST should be a positive experience.
Technicians are full of knowledge and can even help you with choosing a seat for your child. They can also do group presentations to help educate a small or large group of people. Some technicians are even able to help parents who are unable to financially afford a seat for their child. To find a technician affiliated with a fitting station visit www.seatcheck.org


Interested in becoming a CPST?
Visit here to locate a course near you.

Friday, August 10, 2012

Back to School Transportation

It's that time of the year again. It's time for kids to head back to school! It is an exciting time for kids and parents. But figuring out how your going to get to and from school can be a challenge. Some kids walk to school and some may ride their bikes. Many kids ride the school bus to school and many car pool or ride in mom or dads car. There are several ways to help your children remain safe on their way to and from school. Whether they ride their bike, walk, ride the bus, or ride in a car.

Bicycle Safety

For kids who are riding their bikes to and from school the best way to keep safe is to wear a bike helmet. Helmets are the number one way to reduced death and injury to children riding bikes. In 2008, 84 children were killed in bicycle related accidents, according to Safe Kids. Also according to Safe Kids, in 2009, 229,811 children were treated in emergency room  for bicycle injuries. Wearing a helmet would greatly reduce these numbers. Wearing a helmet can reduce the risk of head injury by 85 percent and severe brain injury by 88 percent. Wearing a helmet is an easy inexpensive way to help keep your kids safe while riding their bikes.

There are laws in Louisiana regarding bicyclist wearing helmets. According to Louisiana law R.S. 32:199  any child under 12yrs of age who is riding on a public road, bike trail, or other public right-of-ways must wear a properly fitted and fastened helmet.

There are a few other ways to make sure your child and his bike are ready for the upcoming school year.
  • Give the bike a good look over. Make sure the tires are aired up with no leaks and give the nuts and bolts some tightening. Check the tire alignment, the chain and chain guard, reflectors, brakes, peddles, seat, and handle bars. Make all necessary fixes and adjustments before the first ride to school. 
  • Go over the route you would like your child to take. Go over all bicycle traffic laws and hand signals. Some basic rules to bring up are: always keep your hands on the handle bars, look both ways before crossing the street, walk your bike across a busy intersection or roads, never ride against traffic, and never ride with a passenger on your handle bars. 
  • Explain to kids the importance of being aware of other bicyclist, cars, pedestrians, and road obstacles. Even cars backing out of drive ways pose a threat to bicyclist. 
  • If riding at sun up when its still a little dark outside consider buying a reflective jacket or reflective tape for their helmet. This will make them more visible to motorist on the roads.
  • Make sure there is no chance for anything to get caught in the wheels or bike chain such as back pack straps, baggy long pants, or shoe laces. Also wearing the right shoes will help reduce the risk of crashing. Don't wear sandals, flip-flops, shoes with heels, cleats or go bare foot. This makes it difficult for you to grip the peddles.
  • Don't wear headphones while riding. This makes it difficult to hear traffic, such as a car honking its horn at you. 
 Pedestrian Safety

Nationwide only 13% of kids today are walking to and from school. For children that are walking to school it is important to go over how to be a smart pedestrian. According to Safe Kids, in 2009, an estimated 13,000 children were injured and a total of 244 child pedestrians lost their lives. First things first pick the safest and easiest route to and from school. Walk this route with your child, pointing out possible dangers.  
  • Make sure your child knows to look both ways for any cars coming before crossing the road and to use cross walks or intersection when available.
  •  If any streets on your route have  traffic lights for pedestrians teach your child to press the button and to ALWAYS wait for the walk sign before crossing the street. 
  • When crossing the road WALK don't run and continue to look for any cars that may be coming.
  •  If a car is parked where you are crossing, look to make sure there is no driver and the car is not running. Then go to the edge of the car and look left-right-left to see if  any cars are coming before crossing.
  • Walk on the sidewalk if there is one. If there isn’t and you have to walk on the road, be sure to walk facing traffic so you can see what’s coming.
  •  Consider developing a buddy system and walk with a friend(s) or sibling(s) to school. Walking alone makes children a target to predators.
  • Explain to your child the importance of staying on this route and not to take short cuts through yards and alley ways or stopping to play with a friend.Tell them how it is important they be on time because if they aren't you will begin to worry or they could possibly be tardy for school.
  • Go over stranger danger with your child. Remember to tell them to never ever except a ride from someone you haven't OKed. Ask them to be aware of people around them and to report anyone who looks suspicious to you, another trusted adult, or the police.
  • If your child will be staying home alone have your child call you after they arrive home. Make sure they know important phone numbers in case of an emergency on their way to or from school.
Continue to walk with them until both you and your child feel comfortable with the route. Go over the rules often to make sure your child understands the importance of following the rules of walking to and from school.

Bus Safety

Many children ride a big yellow school bus to and from school. Many parents question the safety of school buses, due to their lack of seat belts. But the fact is statically school buses are the safest way for children to go to and from school. Only 1% of students are killed in bus crashes. 58% are killed in vehicles driven by teens and 23% are killed in vehicles driven by adults.What many people don't understand is that school buses have their own safety system in place. Buses are large and heavy and distribute crash forces differently and safer than family vehicles. Passengers absorb far less crash forces in a bus. Buses also use what is know as compartmentalization to protect passengers in a crash. Compartmentalization is similar to eggs in a carton. Buses have closely spaced seats and high seat backs that are steel reinforced and have energy absorbing padding. According to the National Highway Traffic Safety Administration (NHTSA) compartmentalization has been successful in preventing death and injury to many children is bus crashes. When looking at the statistics and what we know about school buses we see that they are a very safe mode of transportation for children.
A lot of people still do question if school buses could be safer if seat belts were added. Is compartmentalization enough? Some argue that it is not. Even NHTSA has admitted that compartmentalization is incomplete and does not protect passengers during lateral impacts with vehicles of large mass, in rollovers and from ejection. The state of Louisiana is actually one of six states that have a law requiring seat belts on buses. But there is a contingency to this law regarding funding. Due to lack of funding seat belts have still not been added to large school buses. There is also some question as to whether compartmentalization works well for smaller children. Many kids who ride the bus to preschool or a head start program do have seat belts on the buses. They are smaller buses that do require 3 point seat belts or lap belts due to the crash forces being similar to larger family vehicles. Many of these school buses even have the ability to install child restraints on the bus. You can read more about child restraints on buses here.
Both sides have compelling arguments. Many feel that the addition of seat belts would increase the number of children who would not use seat belts, even in their family vehicle. They feel that there is no way the bus driver could make sure every child is buckled up correctly. There for an aid would be required on large buses. Which adds to funding issues to our already spread thin education funding. Either way you look at it crashes involving school buses are rare with sever injury and death being very rare.

There are still some dangers and safety tips that should be considered when riding a school bus. According to NHTSA "since 2000, 130 school-age pedestrians (younger than 19) have died in school transportation-related crashes. Over two-thirds (67%) were struck by school buses, 6 percent by vehicles functioning as school buses, and 27 percent by other vehicles involved in the crashes. There were 56 (43%) school-age pedestrians killed in school transportation-related crashes between the ages of 5 and 7." The greatest risk your child has of riding a school bus is getting on and off the bus.

When getting on the bus:
  • Calmly wait for the bus at the designated bus stop. No running around and playing around at the bus stop. 
  • Patiently wait for the bus to come to a complete stop before approaching the bus. Stand back away from the bus until the bus has come to a complete stop, the driver has opened the door, and is signalling its time to get on the bus. 
  • Stay back from the buses wheels and sides where you might not be seen by the driver of the bus.
When getting off the bus:
  • Wait for the bus to come to a complete stop before standing up to exit the bus
  • When crossing the street always cross in front of the bus. NEVER cross behind the bus. 
  • When crossing in front of the bus make eye contact with the bus driver and wait for a signal that it is OK for you to cross in front of the bus. 
  • Before crossing the other lane of traffic look both ways for any cars
When riding on the bus:
  • Never stand up while the bus is in motion
  • Sit no more than 3 small children to a seat; no more than 2 big children to a seat
  • Keep hands, head, feet and body in the seat. Any one hanging out of the seat may not be appropriatly protected by the compartmentalization.
  • Sit with your bottom on the seat, facing forward, and feet on the ground (or dangling toward the ground)
  • Keep aisles clear of back packs and other possessions. 
  • Be aware of the exits and listen to the bus drivers instructions on what to do in the event of an emergency
 Here are a few laws regarding school buses and school zones that other motorist should familiarize themselves with:

Car Pooling

Car pooling is a common practice done today when transporting children to school. With gas prices being so high parents who do not have the option of buses or living close enough to school for children to bike or walk to school are looking for a way to still get their children to school without spending a fortune. Car pooling is a great option but it does have its own seat of safety issues.
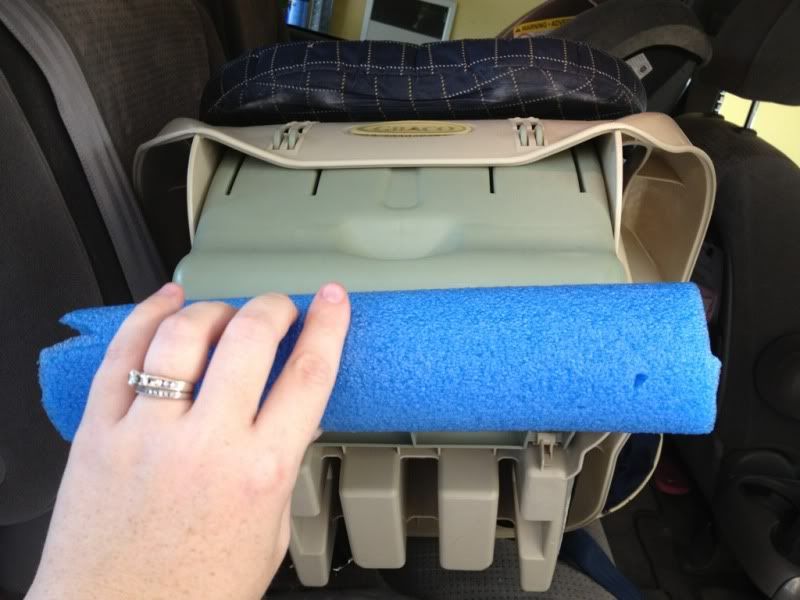
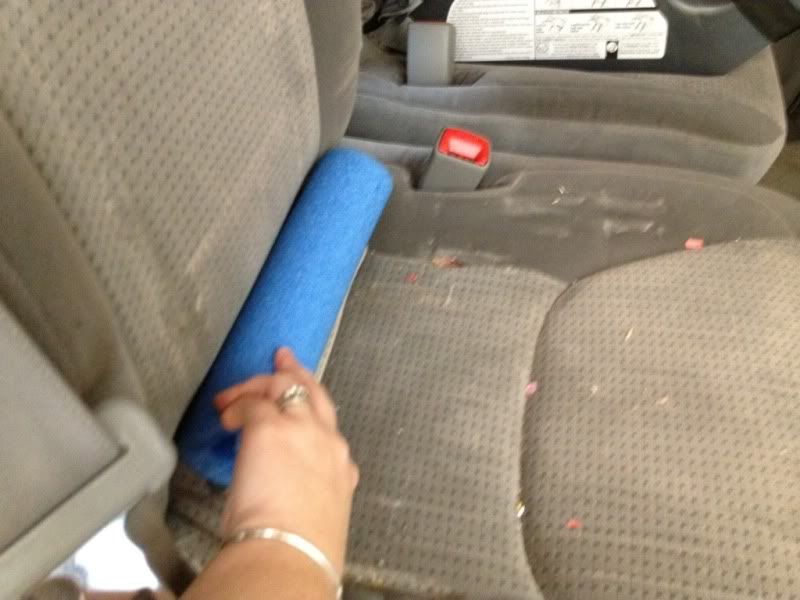
Studies have shown that children who are car pooling are most likely not properly restrained. This is a growing problem. It is important that whomever you are car pooling with understands the importance of properly restraining all children in the car. You can help this by:
  • Offering to provide a seat for their vehicle and teach them how to properly install and use the seat. 
  • Explain to them that if for any reason they do not have the seat to pick up your child to please call you so you can make other arrangements.
  • Make it very clear to all drivers that your child is to always ride in their seat no matter what.
  • Talk with your child and explain to them the importance of riding in their seat. Sometimes kids can be cruel and make comments on how they are riding in a "baby" seat. Explaining to your child that the seat isn't a "baby" seat and the importance of the seat can give your child confidence in riding in their seat.
  • Make sure that all children in your vehicle are properly restrained. Be prepared to say no if there aren't enough seats or a parent cant provide the correct seat.
  • Make sure that all children hear and understand your vehicle rules while driving. Children can be a big distraction to drivers. Have them understand that they are to remain seated and buckled the whole ride, no throwing toys or other things in the car, and to keep hands to themselves. Don't try to deal with any behavior issues while driving, pull over and deal with them then. 
  • If you are uncomfortable with a car pooling situation be willing to talk with the other drivers or to make different arrangements
Car pooling is all about planning ahead and trusting the other driver to be responsible with your child. Once arrangements have been made and trust established car pooling can be an enjoyable experience for all involved.
Another problem parents, especially those new to school, are worried about is the car pick up lane. Talk to the school before the first day of school about their car pick up lane policies. Explain to them that you may need to get out and make sure your child is properly buckled or that it may take a few more seconds for you child to buckle before you are willing to drive off. Tell them the importance of this issue and that you are just trying to insure that your child is safe. Most schools are more than willing to work with parents. If the school has a problem with this ask them if there is another option in picking your child up as you are not willing to put your child's life in jeopardy. Bring them the recommendations from NHTSA and the AAP on car seat safety to prove your point. Stand your ground and they will likely work with you on the situation eventually.

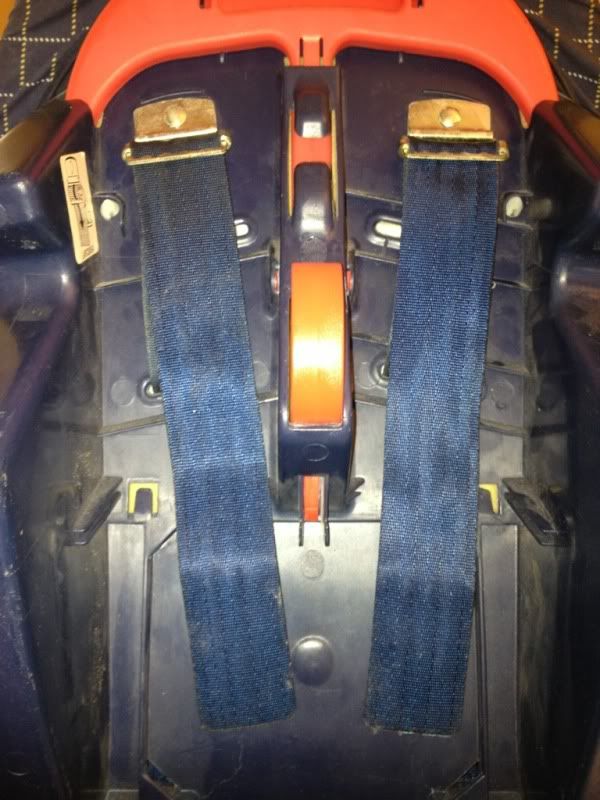
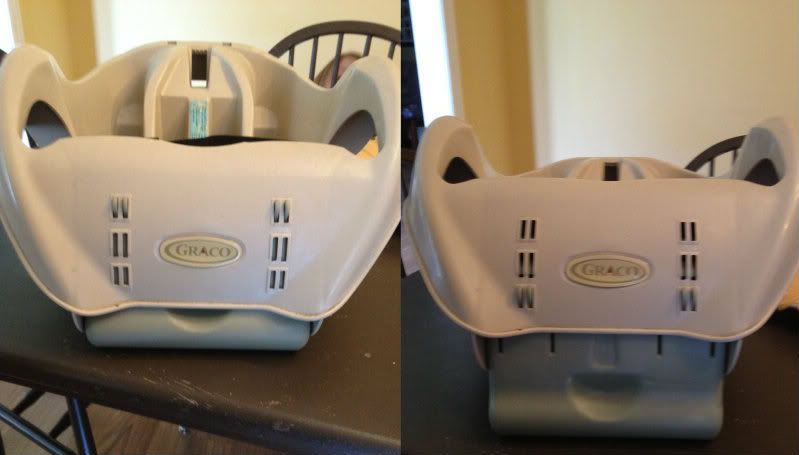
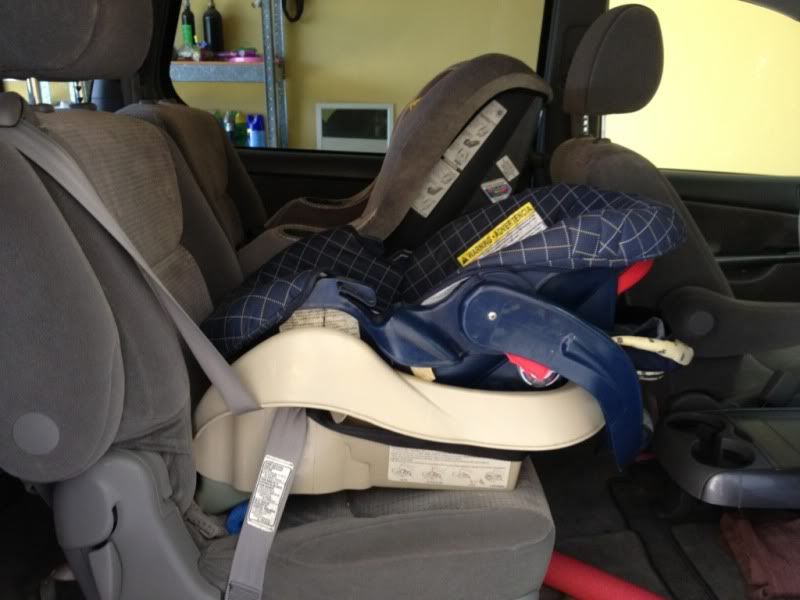
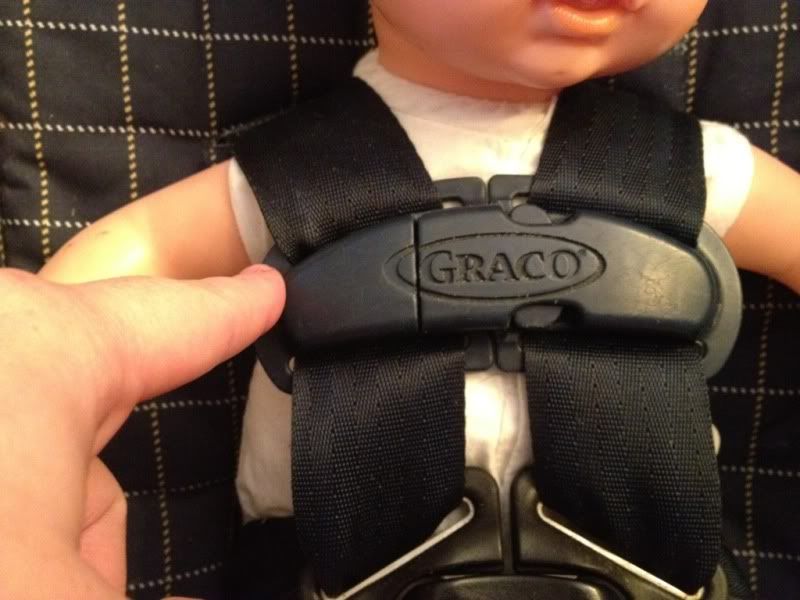
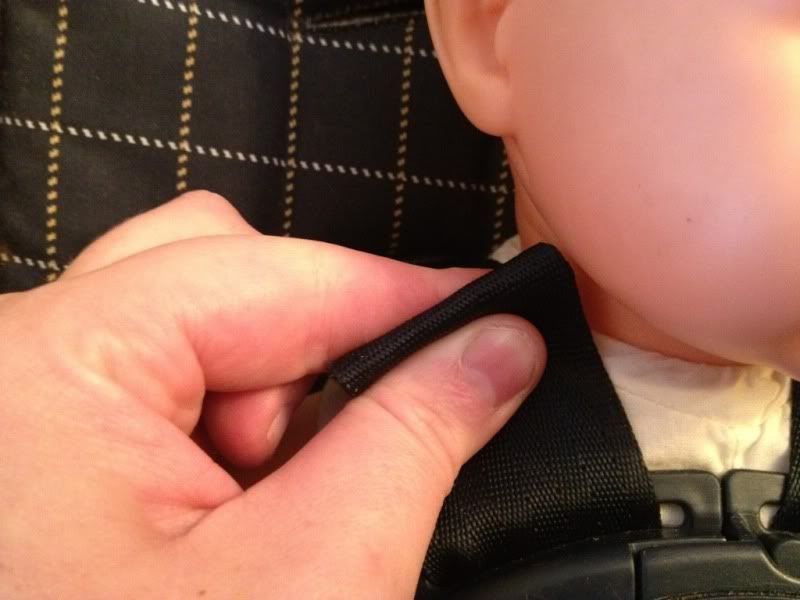
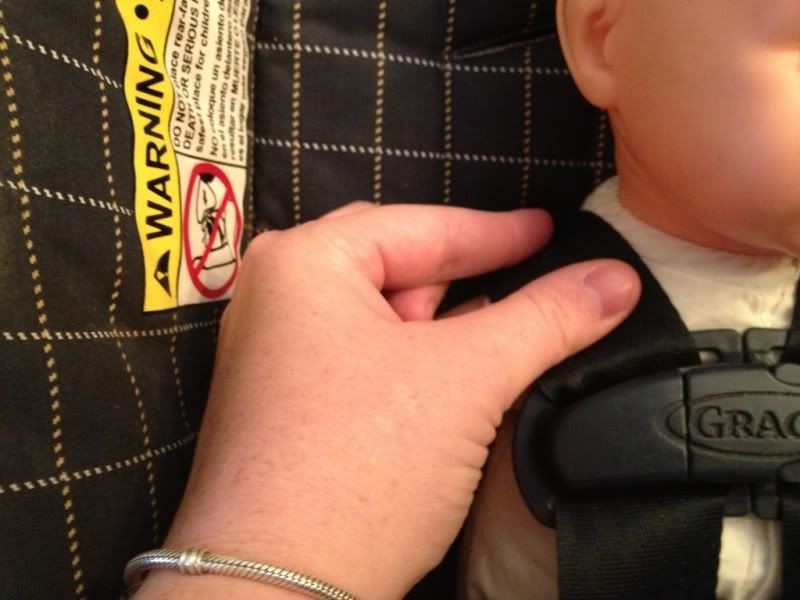
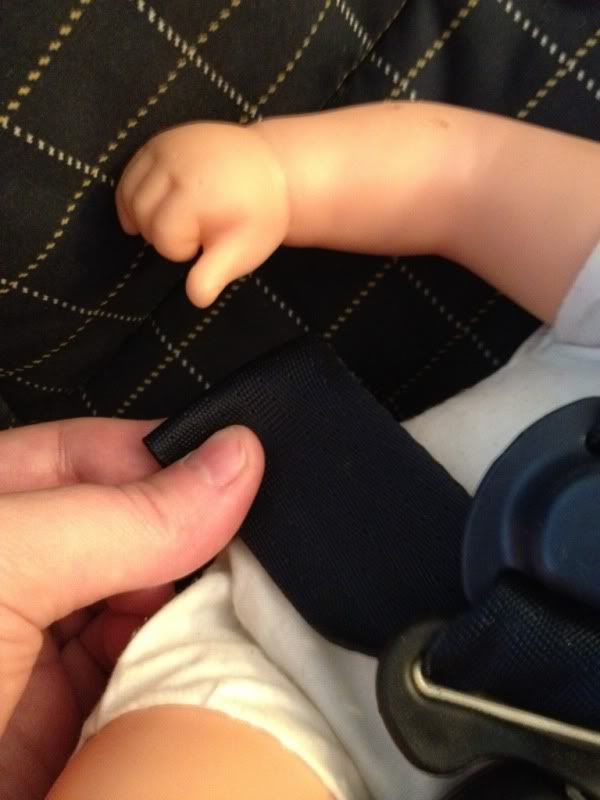
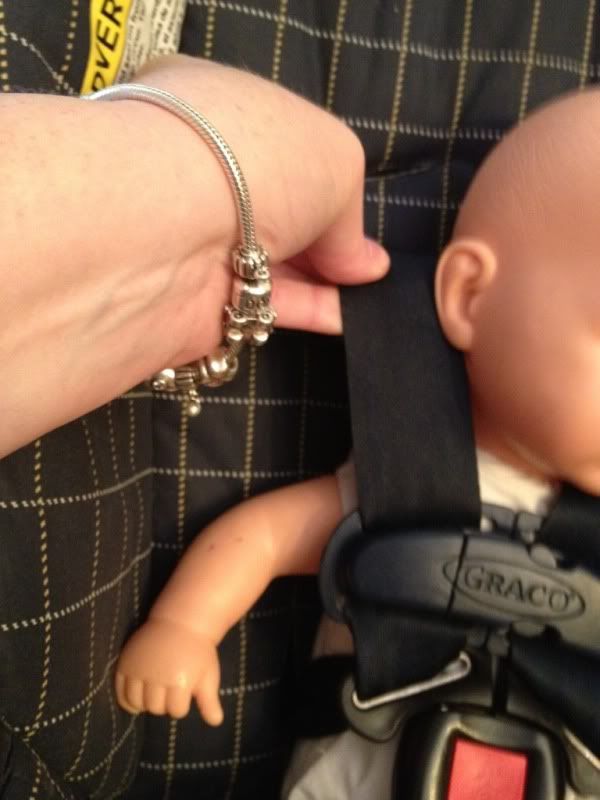
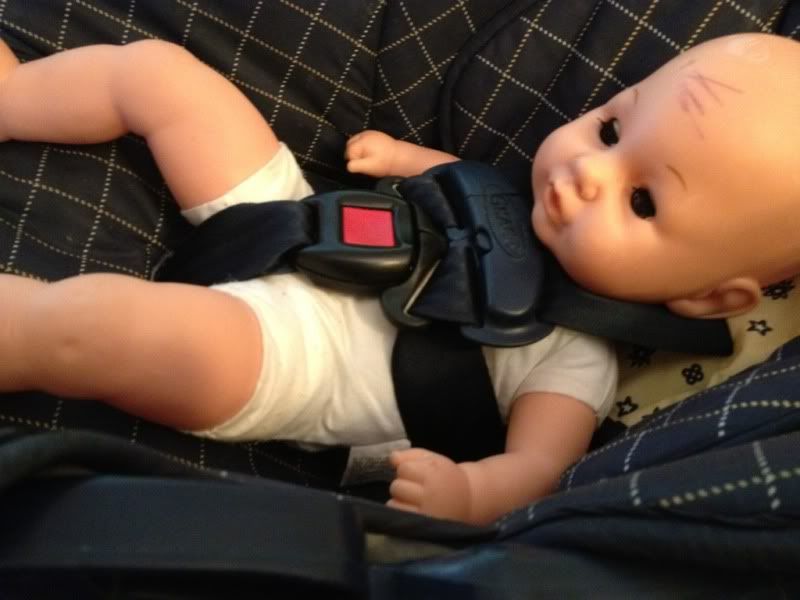
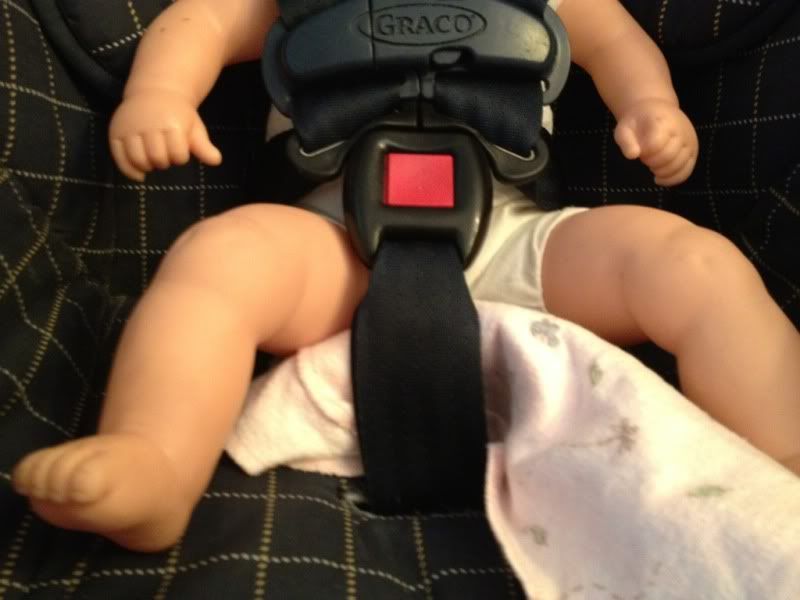
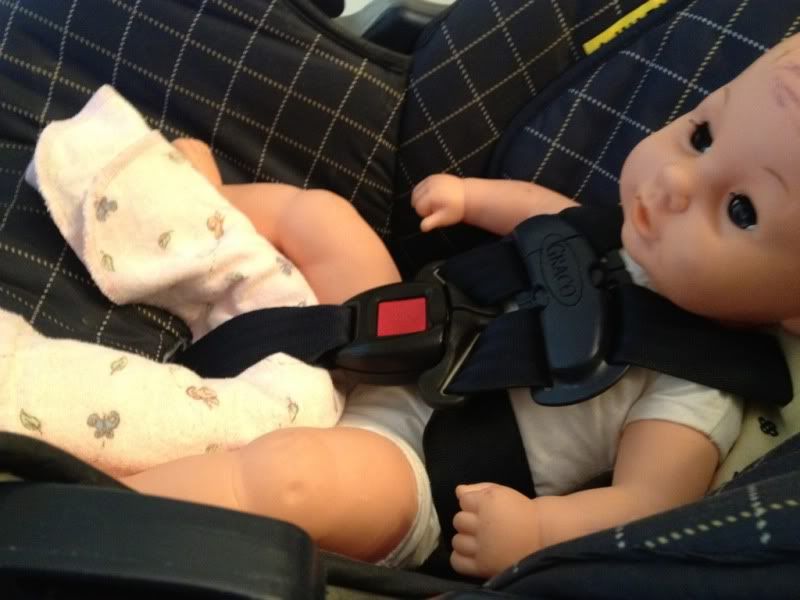
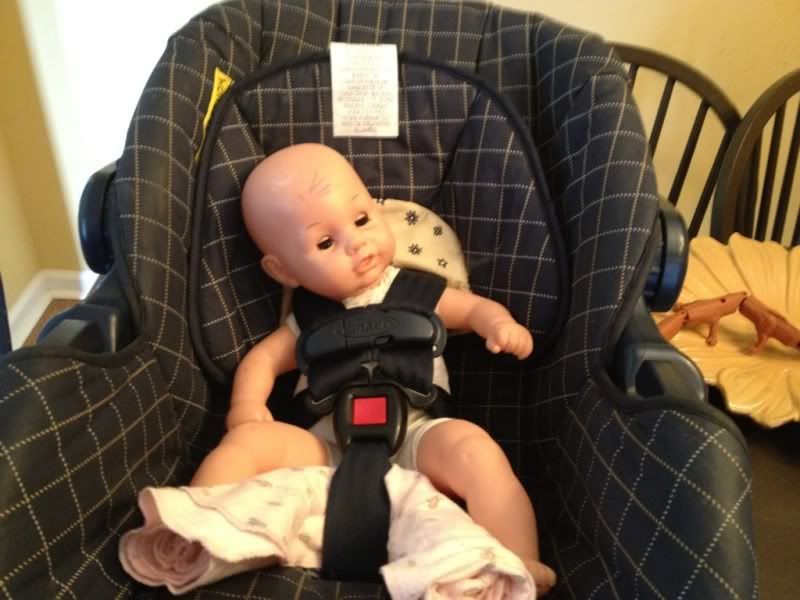
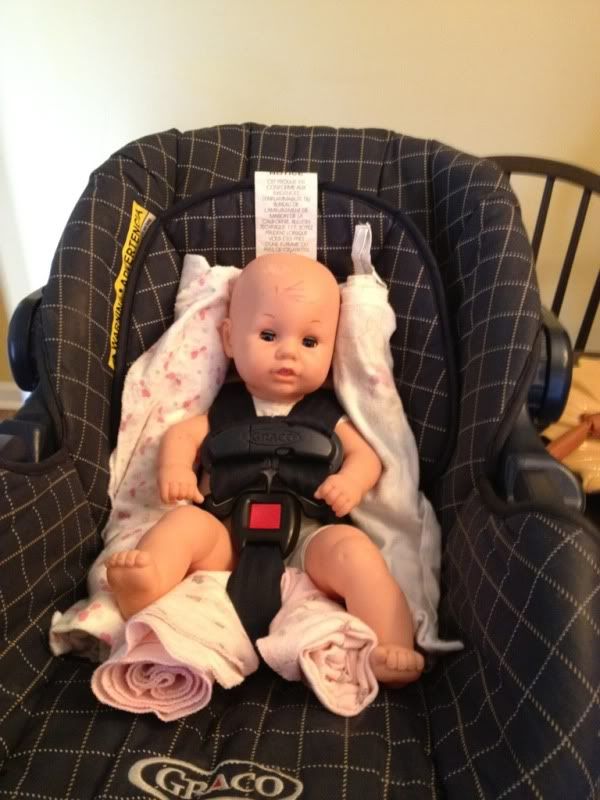
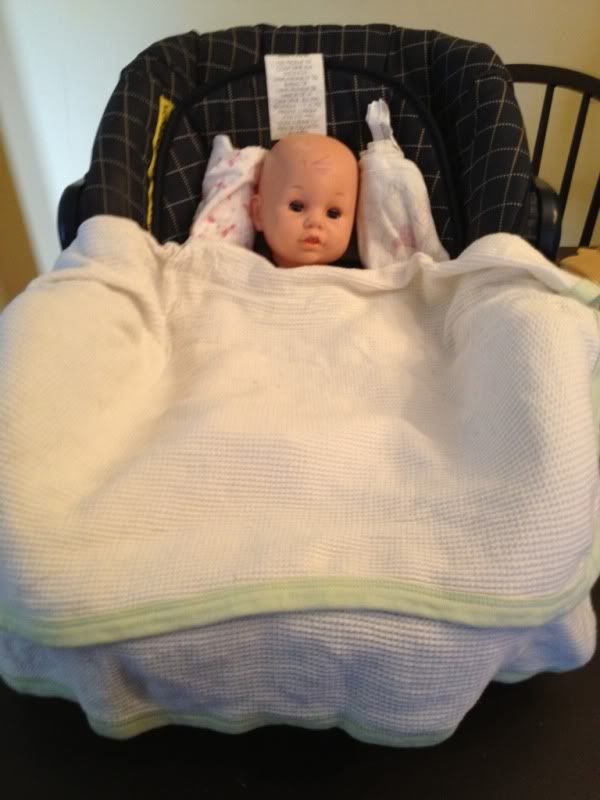
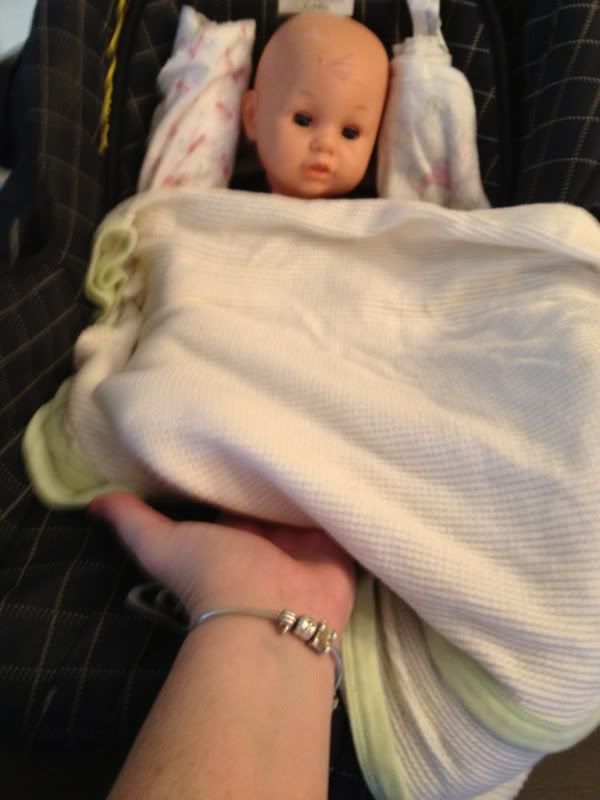
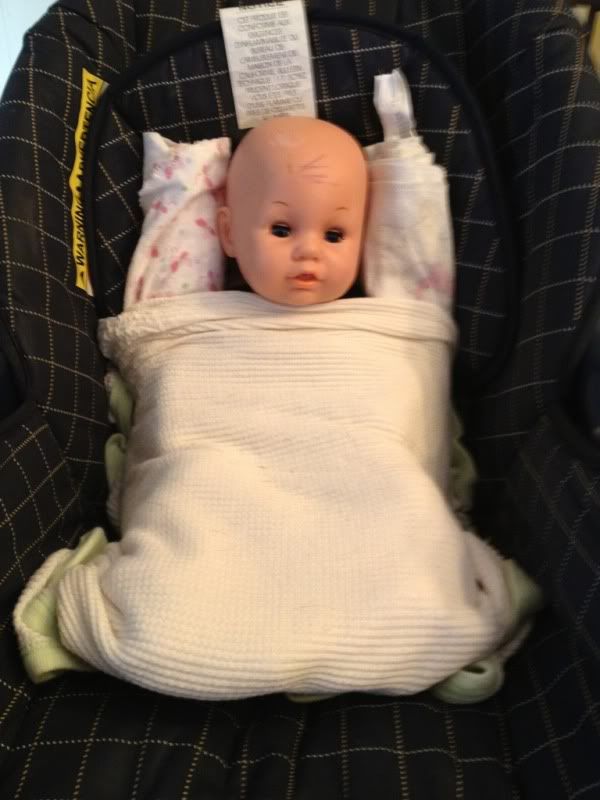
Proper Child Restraint Use
  • Children should remain rear facing until they are at least 2yrs of age. It is best to keep them rear facing until they have outgrown their rear facing convertible seat (read more here). This could be until as old as 4yrs of age.
  • Children who are at least 2yrs old or children who have outgrown their rear facing convertible seat should be in a forward facing car seat until they are at least 4yrs old and 40lbs. It is best to keep children harnessed until they are mature enough to sit in a booster (read more here). Children are normally mature enough around 5-8yrs old. 
  • Children who are at least 4yrs old and 40lbs or children who have outgrown their forward facing convertible seat who are mature enough should ride in a booster (read more here). Children should remain in a booster till they fit correctly in the vehicle seat belt. This is normally around 4ft 9in, the average height of an 11yr old. 
  • Children should remain in the back seat until they are 13yrs of age.

Thursday, June 14, 2012

Fixing Common Problems with Newborns and Car Seats

Every day parents strap their precious newborn into the car seat  for the first time and take the long slow nerve racking ride home. Many times parents notice that their newborn doesn't fit in their car seat exactly how they expected. Newborns have very little head control and parents notice that the baby's head tends to flop forward, causing chin to chest. Sometimes they notice that the baby seems to be slouching in the seat or leaning side to side. These are common issues associated with newborns and car seats.
Some times the car seat comes with a head support that can help with these problems. But most of the time parents try to use after market products, like head supports that don't come with the seat, to fix these problems.  This can be dangerous since these head supports are not tested with the car seat and most of the time it doesn't fix the problem. A head support that did not come with your car seat can sometimes even increase the chances that your baby will have chin to chest. Im hoping I can go over a few tips and tricks here to help fix these problems.

First of all when shopping for an infant car seat keep mindful on the lowest weight limit. If you are expecting twins or a low weight baby you may want to opt for a infant car seat that has a 4lb minimum weight limit. Most infant car seat have a 5lb weight limit and will fit the average newborn just fine. Also infant car seats with low bottom slots are more likely to fit newborns. Something with bottom slots around 5-7 inches will fit a newborn best.
I also recommend buying a car seat with the ability to adjust the tightness of the harness in the front and not the back. Front adjust seats are much easier to adjust the tightness of the harness than rear adjust.


Font Adjust: you pull the tail hanging from the front of the car seat to tighten the harness

Rear Adjust: you pull each individual tail behind the car seat to adjust the tightness of each side of the car seat's harness. This can be difficult.
Top 3 infant seats I recommend are:
  •  Graco SnugRide 30, 32, and 35          
                     30 weight limit 4-30 lbs; lowest bottom slots 6.5 in
                     32 weight limit 5-32 lb; lowest bottom slots 7 in
                     35 weight limit 5-35 lb; lowest bottom slots 6.5-7.5 in
  • Chicco Keyfit 30 weight limit 4-30 lbs; lowest bottom slots 7 in
  • Britax Chaperone weight limit 4-30 lbs; lowest bottom slots 6.5 in without insert, 5.25 in. with low birth weight insert

One of the most common complaints of parents with young babies is that their head flops forward to their chest. This can be dangerous. Baby's have small air ways and weak necks. When their chin touches their chest it can effect their breathing. So it is important that the baby's chin does not touch its chest. This can be fixed by making sure that the baby's car seat is properly reclined.


Most babies are going to need the car seat to be reclined at a 45 degree angle. You may not recline their car seat any more than 45 degrees and you should always follow the level indicators on the car seat. If your child's car seat doesn't have a level indicator, just a level line, you may use a level app on a smart phone to determine the recline angle.

Some car seats have a foot that is able to adjust to increase the recline in the car. Try installing the seat with the foot in all the different levels of recline until you get as close to a 45 degree recline without going over 45 degrees.


But sometimes the most reclined position isn't enough to achieve the angle you want. You'll need to use either a tightly rolled towel or a pool noodle. For this demonstration Ill be using pool noodles. You can get these at Walmart during the spring/summer months for less than $2 a noodle. During fall/winter check with some of the pool supply stores to see if they have any.
  • First cut the pool noodle to be the same length as the base of your car seat.

  • Then place it at the bite of the vehicle seat. This is were the back portion and seat portion of the vehicle seat meets.

  • Place your car seat on top of the pool noodle and install your child's car seat according to the car seat's manual.

If this is still not enough recline for your newborn you may use 3 cut pool noodles taped in a pyramid. Place the 3 noodle pyramid in the bite of the vehicle seat and install the car seat according to the car seat's manual .


You can see in these pictures the difference in recline.
  • With the car seat's recline foot all the way in 

  • With the car seat's recline foot all the way out

  • With one noodle

  • With a 3 noodle pyramid


Once you have achieved the appropriate angle for your child's car seat you are now ready to place your child in the car seat. There's a few things you should be sure of when placing your baby in their car seat.
  • The harness straps need to be at or below your baby's shoulders


  • The chest clip needs to be even with their armpits.

  • The harness should be snug enough to pass the pinch test.You should not be able to pinch any extra harness webbing at the child's collar bone.

Too loose!


Correct!
  • An important thing to keep in mind is to make sure there isn't slack in the harness at the hips.

  • Pull up on the harness at the shoulders to pull out all the slack in the hips. Then tighten the harness tight enough to pass the pinch test. This will allow you to get all the slack out of the car seat's harness.

 Why its important to have a tight harness: video You can see in the video that the baby's head move much less with a properly tightened car seat.


Sometimes the baby still has some issues fitting into the car seat. Like slouching or tilting their head/body to the side. These are things that can easily be fixed without using an after market head support.


A lot of times little babies will slouch in their seat.


To prevent this make sure you are using the most inner buckle slot, check your car seats manual on how to adjust your buckle. If you are unable to adjust your baby's buckle slot or you have adjusted it to the inner slot and your baby is still slouching you can use a rolled up receiving blanket to help boost baby up. You want the baby's back to be flush against the back of the car seat.

  • This kind of gaping between baby and the buckle strap can cause slouching.

  • Take a receiving blanket and roll it up tightly

  • Slide the rolled receiving blanket between the baby and the buckle strap until it makes an upside down horse shoe.

 You can see how much better the baby fits in the car seat compared to the before picture above.
Sometimes the baby's head can tilt to the sides. You can also fix this with tightly rolled receiving blankets.


  • Roll 2 receiving blanket just like before


  • Tuck one rolled receiving blanket on each side of the baby. Make sure not to place anything behind the baby's back.
This will help support the baby and keep them from shifting in an odd position.


 If your baby is crying and seems uncomfortable remember that newborns have just come from a world that was warm and tight. You can use a blanket tucked around the baby, but not behind baby's back, to make them feel more secure in their car seat.
 
 
 And your baby is ready for their first ride home!


Tuesday, April 17, 2012

The Dangers of an Unattended Child

 Every year many children die from hyperthermia. The most common cause of hyperthermia is heat stroke. Children are more susceptible to hyperthermia than adults. Infants and small children do not maintain their body temperature as well as adults do. Their bodies heat up five times faster than an adult.
One of the common ways that children suffer from hyperthermia is being left unattended in vehicles. The inside of a vehicle, even on cool days, can get dangerously hot and hot quick. Your vehicle is like a giant metal oven being heated by the sun. In 80 degree weather a car can heat up to 123 degrees in just 60 min. Even in 10 minutes the temperature in the vehicle can rise 20 degrees and 34 degrees in 30 mins, about the time it would take a care giver to run into the store.
Picture will take you to a video
Heat stroke will happen when the childs body cannot cool itself quick enough. The child's core temperature will rise to dangerous temperatures which can resulting in kidney or liver damage, brain damage, or even death. Children can go into heat exhaustion in temperatures as low as 90 degrees with heat stroke being possible at temperatures of about 105 degrees. Even with the windows down the temperature can rise and be harmful for children.

How big of a problem is this?
According to SafeKids 527 kids have died since 1998, with 49 of those deaths happening in 2010. On average 38 children die yearly from being left unattended in vehicles.
Most of the incidents are accidents made by distracted parents. Safekids says about 50% of children who die from hyperthermia are due to the child being forgotten by accident.
I know what your thinking, how could you forget your child. But it happens and it happens to good parents. It happens because a schedule changes, it happens because we are busy and stressed, it happens because we are tired, it happens because we are human and we make mistakes. Unfortunately those mistakes have consequences that these parents must live with, consequences that no loving parent should have to live with.

What are some steps parents can make to prevent this?

  • Never leave children in a vehicle to make a quick run into the store or gas station
  • Put your purse, briefcase, cell phone or something you always take with you on the floor board by your child
  • Ask your day care provider to please call you if you are 5 min later than normal. Make it a habit to keep in contact with all your child's care givers and make sure they know how dangerous an unattended child is in a vehicle
  • With all the wonderful technology of this world you can set your cell phone to remind you to check for your child in the vehicle. There is even an app for that! Baby Reminder is a free Iphone App that was set up to help remind parents the child is in the car.
Do whatever you need to do to remind yourself. Make it habit to check anyway, this is what I do, leave sticky notes, have your partner call you, whatever it takes. This can happen to you, even if you're the best parent in the whole world. Using these preventive steps will help you avoid making this mistake.

 Trapped in a Trunk
 According to SafeKids 30% of hyperthermia deaths are due to children becoming trapped in the vehicle's trunk. Children are very curious by nature. They like to play games and discover new places. Sometimes they are even looking for a missing toy. But this can quickly become dangerous when the family car is involved. Trunks are even worse than being left unattended in the vehicle. They are not just high in temperature but high in humidity and low in ventilation. It is estimated that 35-40% of children under 14 who are entrapped in a vehicle trunks do not survive. Its important that parents take steps to prevent children from being entrapped in vehicles trunks.

What are some steps parents can make to prevent this?
  •  Keep vehicles locked when unoccupied and keep keys out of reach of children
  • Never allow children to play in and around vehicles. Teach older children that vehicles are not playgrounds and they should never ever play in them. When children are in and around vehicles supervise them closely
  • Teach children about the glow in the dark trunk release in case they ever find themselves trapped in a trunk. Every vehicle since September of 2001 are required to have these.

Louisiana Law
SafeKids say that 17% of hyperthermia deaths are due to care givers intentionally leaving a child in the vehicle. In Louisiana we have laws making it illegal to leave children under 6yrs of age unattended in a vehicle. We are one of 19 states with a law against leaving children unattended in vehicles. In our law "unsupervised" is defined as a parent/guardian who is more than 10ft away from the vehicle or when someone who is 10yrs or older isn't with the child in the vehicle. If you ever see a child under 6yrs of age in a vehicle alone call 911 immediately. Police officers must remove the child, leave a notification, and wait with the child until the parent/guardian returns to the vehicle. Police officers are also protected from any legal liability by his action as long as they are considered in good faith. The person who has left the child unattended can be fined up to $500 and possibly sent to jail for 6 months for the first offense. Consecutive offenses will be charged $1,000-$2,000 and possibly sent to jail for 1-2yrs with or without hard labor. These are pretty serious punishments.

How to Tell if a Child is Suffering from Heat Exhaustion/Stroke and What to Do About It
 If you find your child or another child who has been left unattended in a vehicle or trapped in a trunk you should immediately call 911. Heat exhaustion is when the body is dehydrated and loss of salt through excessive sweating. Children suffering from heat exhaustion are normally profuse sweating, have pale skin that is cool to the touch but their core body temperature is high, rapid and shallow breathing, headache,nausea, vomiting or diarrhea,dizziness, weakness or fainting, lethargic behavior, and muscle cramps. If you find a child whom you think is suffering from heat exhaustion try and cool them off. Remove extra unneeded clothing, use cool damp cloth to cool them off, and see if they will drink some cool water. Seek medical care as soon as possible. Heat stroke is more sever than heat exhaustion. But they are similar. Signs that differ from heat exhaustion are core body temperature above 104, no sweating, hallucinations, trance-like or irrational behavior, and increased heart rate. If you find a child who is suffering from a heat stroke you should call 911 immediately. Try cooling the body off with cool water or even with ice but do not give fluids. Please seek medical attention immediately!

Visit SafeKids to learn more about the dangers of an unattended child.

Monday, April 9, 2012

Seat Belt

When it comes to installing car seats there are two ways to do it, either LATCH or with the vehicle seat belt. (Some Ford vehicles will allow the use of both seat belt and LATCH. But both the vehicle and the car seat must agree with this. The only car seat manufacture as of now that allows this is Combi. Check out this blog post from Lexlee's Kids.) The seat belt is just as safe as using LATCH. The vehicle seat belt is often needed in some situations. When that seating position doesn't have LATCH, or you cant get a tight installation with LATCH, or even vehicles that do not have LATCH. But not ever seat belt in every car is the same.
There are two types of main seat belts. A two point seat belt, also know as a lap only belt and a three point seat belt that is also know as a shoulder/lap belt.

Parts of a Seat Belt

Webbing
The fabric part of the seat belt

Latch plate
The seat belt part that connects the webbing to a buckle into the vehicle. The male portion of the seat belt.

Buckle
The buckle accepts the latch plate and holds the seat belt in place. The female portion of the seat belt.

Buckle stalk
The fabric/webbing that is connecting the buckle to the vehicle

Retractor
Retractors gathers and stores the extra webbing of the seat belt.


There are several different types of seat belts. Since 1996 vehicles have been required to have locking seat belts to help with the installation of child safety seats. Some lock at the latch plate and some lock at the retractor. When installing a car seat with a seat belt the seat belt must be locked in one of for ways; by the latch plate, by the retractor, by a locking clip, or by a belt shortening clip.

Types of Latch Plates

Locking Latch Plate
This is the type of latch plate that locks. The latch plate will lock either by a little bar mechanism that will not allow for the webbing to slide from the latch plate or a button on the latch plate that when turned will lock the latch plate not allowing the webbing to slide freely from the latch plate.

Swen on Latch Plate
This is a latch plate were it is sewn onto the belt. This type of latch plate does not lock.

Sliding Latch Plate
This is the type of latch plate that slides freely up and down on the seat belts webbing without locking.


Types of Retractor

Emergency locking retractor (ELR)
This is the type of retractor that locks only during an emergency. This seat belt will lock when you pull it too quickly, make a sudden stop, turn too quickly, or during a crash. But when you pull the webbing all the way out it will not switch over to a Automatic Locking Retractor (ALR). These types of seat belts are often found in the drivers seat.

Automatic Locking Retracor (ALR)
This is a type of retractor that locks automatically. Once you stop pulling the webbing out it automatically stops allowing you to pull any more webbing out, regardless if its the end of the webbing or not.

Switchable Retractor
A switchable retractor is an emergency locking retractor that when the webbing is pulled all the way out it becomes a automatic locking retractor.

If you are unsure of what type of seat belt your car has you can always find that information in the vehicle's manual.


Installing with Automatic Locking Retractor
Always read both the vehicle and the car seats manuals to know exactly how to install your particular car seat in your vehicle.

When installing with an automatic locking retractor (ALR) you thread the seat belt in one smooth motion through the car seats correct belt path and buckle the seat belt. Then press firmly down on the car seat. As you press down the webbing will feed into the retractor automatically locking. Continue to push down firmly on the car seat until there is less than 1" of movement when tugged firmly sided to side and front to back at the belt path.

Installing with a Switchable Retractor (video)
Always read both the vehicle and the car seats manuals to know exactly how to install your particular car seat in your vehicle.

When installing with a switchable retractor thread the seat belt through the correct belt path and buckle it in. Pull the shoulder portion of the seat belt all the way out of the retractor. You will often hear it click. Start feeding the seat belt back into the retractor, trying pulling it out of the retractor a few times to make sure it is locked. Press firmly on the car seat and continue to feed the seat belt into the retractor, removing all slack. Continue to push down firmly on the car seat pulling the seat belt and feeding it into the retractor until there is less than 1" of movement when tugged firmly sided to side and front to back at the belt path.
Troubleshooting: If you can not get the car seat snug enough you can twist the buckle stalk. Some vehicles will have very long buckle stalks making it difficult to get a tight installation. You may twist the buckle stalk up to three times but you want to use as few twist as possible. Thread the seat belt through the correct belt path, twist the buckle stalk up to three times, and buckle it in. Pull the shoulder portion of the seat belt all the way out of the retractor. You will often hear it click. Start feeding the seat belt back into the retractor, trying pulling it out of the retractor a few times to make sure it is locked. Press firmly on the car seat and continue to feed the seat belt into the retractor, removing all slack. Continue to push down firmly on the car seat pulling the seat belt and feeding it into the retractor until there is less than 1" of movement when tugged firmly sided to side and front to back at the belt path.

Installing with a Locking Latch Plate (video)
Always read both the vehicle and the car seats manuals to know exactly how to install your particular car seat in your vehicle.

When installing with a locking latch plate examine the latch plate to determine what type of locking latch plate your vehicle has; one with a button or one with a bar mechanism. If its the type with the button switch the button to the child position. Thread the seat belt through the correct belt path and buckle it. Push down firmly on the car seat and pull the webbing as tight as you can, removing all slack. Continue to push down firmly and pull the webbing as tight as you can until there is less than 1" of movement when tugged firmly sided to side and front to back at the belt path.
Troubleshooting: If you have a locking latch plate with a bar mechanism on a lap only belt and it will not lock because of the position the belt is laying you may flip the latch plate. Thread the seat belt through the correct belt path and buckle it. Push down firmly on the car seat (helps if you use your knee) and pull the webbing as tight as you can, removing all slack. Unbuckle the seat belt while continuing the push down on the car seat. Flip the latch plate to where the bar mechanism is facing outward. Buckle the seat belt back. Test the car seat for a tight install by tugging firmly side to side and front to back at the belt path. There should be less than 1" of movement in any direction. If there is more than 1" of movement unbuckle the seat belt and start over, this time pressing more firmly into the car seat.

What to do if neither the vehicles retractor or latch plate lock?

Locking Clip (video)
 Always read both the vehicle and the car seats manuals to know exactly how to install your particular car seat in your vehicle.

If you have a lap and should belt that does not lock at either the retractor or the latch plate then you will need to use a locking clip. (you may never use a locking clip on a lap belt only seat belt) All car seats come with a locking clip, if you have lost yours they can be purchased at Toys/Babies R Us or through the manufacture of the car seat.
To install a car seat with a locking clip you will need to thread the seat belt throught the correct belt path and buckle the seat belt. Press firmly down on the car seat and pull the seat belt to remove all slack. Pinch the seat belts webbing near the latch plate. Unbuckle the seat belt. Attach the locking clip within 1" of the latch plate. Rebuckle the seat belt. Then test the car seats tightness by pulling firmly at the belt path side to side and front to back. There should be less than 1" of movement in any direction. If there is more than 1" of movement remove the locking clip and start over pressing more firmly into the car seat removing more slack. Sometimes it can be easier to install a locking clip with two people. One person holds the car seat down and the other attaches the locking clip.

A locking clip is also used when a car seat has a tendency to tip or lean to the side. This happens sometimes with a lap and shoulder belt that locks at the retractor. The shoulder portion of the belt with continue to feed into the retractor locking and pulling the car seat to the side making it lean. To fix this problem instead of locking the seat belt at the retracor you would use the locking clip instead.

Lock Offs (video)
Always read both the vehicle and the car seats manuals to know exactly how to install your particular car seat in your vehicle.

Some car seats are equipped with lock offs. Lock offs are claps attached to the car seat that will clamp over the seat belt locking it in place. To install a car seat with lock offs you start by opening the lock off. Thread the seat belt through the correct belt path and buckle the seat belt. Push down firmly on the car seat and pull the seat belt tight, removing any slack. Place the seat belt it the correct lock off (you'll need to read the car seat manual to know witch part of the seat belt goes into witch lock off). Clasp the seat belt with the lock off. Then test the car seats tightness by pulling firmly at the belt path side to side and front to back. There should be less than 1" of movement in any direction. If there is more than 1" of movement undo the lock offs and start over pressing more firmly into the car seat removing more slack.

Belt Shortening Clip
Always read both the vehicle and the car seats manuals to know exactly how to install your particular car seat in your vehicle.

A belt shortening clip looks very similar to a locking clip. You would purchase a belt shortening clip from the manufacture of your vehicle. You may never use a locking clip in the place of a belt shortening clip, you may however use a belt shortening clip in the place of a locking clip. A locking clip is not nearly as strong as a belt shortening clip and can not preform the job of a belt shortening clip. Belt shortening clips are used on Emergency Locking Retractors (ERL) with sown on latch plates. The seat belts are unable to lock in a way to install a car seat without the belt shortening clip. Luckily many seat belts are not made this way. It is unlikely that you will ever need to use a belt shortening clip.
If you find that you will need a belt shortening clip I would contact a very experienced Child Passenger Safety Technician/Instructor to help you.


Seat Belt Tightener
These are a BIG NO NO! Do not use one of these. You don't need to. If installing your seat correctly you will be able to achieve a tight install. Seat belt tighteners can over tighten your seat belt, break parts of your seat belt or car seat, and can possible break free in a crash and become a heavy projectile. They are not tested with your car seat and you shouldn't use them, nor do you need them. Seek help from a Child Passenger Safety Technician if you aren't getting a tight installation.


You should ALWAYS read though your car seat's manual and your vehicle manual. Your car seat's manual will tell you exactly how to install your seat and your vehicle manual will tell you important information about its seat belts or LATCH. If you are having problems with installing your seat please visit a certified child passenger safety technician. You can find one at www.SeatCheck.org

Inflatable Seat Belts (video)
 Inflatable seat belts are a new option in some Ford vehicles. Many car seat manufactures do not allow you to install their seats with inflatable seat belts. You will need to contact the manufacture of your car seat and ask before installing your car seat or booster with an inflatable seat belt.


Seat Belt Strangulation
Seat Belts with locking retractors can be dangerous. Sometimes children will play with the seat belt, pull the seat belt all the way out and switch it to locking mode. They will wrap the seat belt around themselves and the seat belt with tighten and tighten as its fed into the retractor. This has been know to strangle children. To learn more about seat belt strangulation and how to prevent them visit this link.